HOW TO CREATE A MAP FOR YOUR BOOK: DIY version + Other Avenues to Explore by Anna Leitensdorfer
 Today we welcome a new guest writer to Writer’s Fun Zone, Anna Leitensdorfer who is stopping by to chat with us about “HOW TO CREATE A MAP FOR YOUR BOOK: DIY version + Other Avenues to Explore.” Enjoy!
***
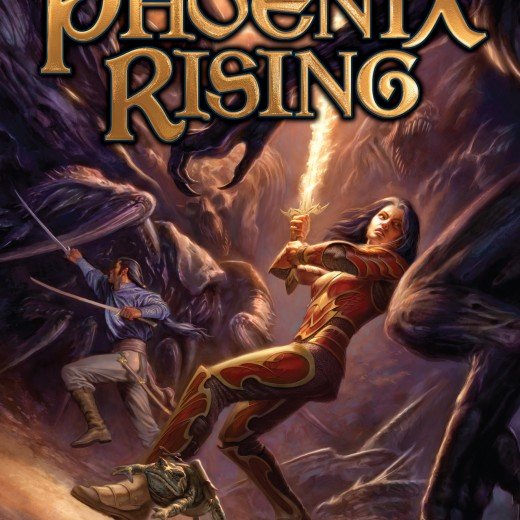
Maps are such a fantastic way to add some more of that worldbuilding lore to your novels.
While they are more prominent in fantasy books, they are also very useful in dystopian and historical novels.
Not only that, but they can also be utilized as a great marketing tool — or if you just need a quick reference to orient yourself (and your characters).
A good map can really draw your readers in — and they are commonly within the first few pages (or endpapers) before Chapter One.
They will be the first thing many readers will see when they open the book, so nail that first impression!
Do-It-Yourself!
1. Rice/Bean Method
This is a very popular method.
The gist of it is, you get a handful of rice or beans and toss it onto a large sheet of paper.
Draw around chunks to make landmasses and islands and add in rivers/lakes/mountains/etc later.
You can then scan or take a picture of it to transfer to your computer and draw on top of it in a drawing program if you so wish.
A few clients of mine have sent their preliminary maps this way.
In reality, you can use pretty much anything instead of rice or beans.
I’ve seen people use a large handful of paperclips too!
Pro tip: look to history.
When people settled new lands, cities and towns were commonly near waterways/rivers as they were prime spots for transport and trade.
Remember, using some real-world examples will make your map — and your world — more believable.
2. Silhouette Method
This is my personal favorite.
You can use globs of paint or watered down ink but if you’re savvy with programs like Photoshop you can select a super crazy brush, (I lean toward foliage/leaf brushes) size it up a bit, then just go crazy creating shapes.
Make a few passes, create like 3 silhouettes, pick one you like, then refine.
Draw around the silhouette to create the landmass on a different layer (outline it.)
Don’t follow the edges of the silhouette too closely; let your hand be a little jagged as you outline.
After you get an outline you like, then you can add rivers, lakes, mountains, oceans, and other topography that will give your map some depth.
Add in your titles, names, and cities.
And there you have it — a map!
Other Options:
Hire an Artist
There are hundreds, if not thousands, of artists available that specialize in cartography.
When looking for an artist, look at their style, previous works, and if they are familiar with formatting for books.
This route can be expensive, so start saving early while comparing artists and their prices.
On the flip side, you’ll have a high-quality asset to add to your book and use for marketing.
Keep in mind, though: you get what you pay for.
You don’t have to go all out, but you will still need to have a quality product that will impress your readers.
You can find many of them online through social media by searching “fantasy map cartographer” (or similar keywords) or make a call for artists on Instagram or Threads.
Or, look at some of the books you own with maps inside and see if you can find out who created the map and search them that way (sometimes they are credited on the copyright page).
Also, don’t be afraid to talk to other authors who have already gone through the process of looking for the right artist.
Use an App
For some, an artist may be out of budget.
Some popular apps to use to make maps include Inkarnate.
That being said, if you use ANY map-making program, you MUST check the licensing!
Commercial use is what you are looking for (you must have a commercial license to include in your book).
On top of that, paid versions include more benefits such as access to a larger asset library.
As of right now, Inkarnate’s Studio paid option appears to be the only one that offers commercial use.
If you are tech savvy, another app you can use is Procreate, which can be found on the Apple app store.
I use it on my iPad and the user interface is pretty friendly.
Now, you don’t have to know anything about drawing as there are many brush packs online which provide ready-made assets for maps.
I did a search on Etsy for “Procreate Fantasy Map Bundles” where you can then select and download packs you like. Some packs will be readymade; as in, instead of drawing everything out by hand they’ll be more like stamps.
Need a mountain?
Select it on Procreate’s brush panel and tap to make a mountain.
Make sure you download the right version depending on what drawing app you’re using!
And, you must check and see if the brush pack/asset pack you’re purchasing has a commercial use license.
Hands-On Worldbuilding
Remember, there are PLENTY of options to create a map for your book without having to resort to AI!
Now, get out those beans, paperclips, brushes, or your computer, and start making some crazy shapes!
About the Author
 Anna Leitensdorfer is an illustrator, animator, and author who began offering creative services to fellow writers in 2024.
She provides illustration for children’s books, storyboarding, cover design, character art, interior art, maps, and promotional artwork for marketing.
A 2018 graduate of the Savannah College of Art and Design with a degree in Animation, Anna continues to pursue her passion for storytelling through visual media.
She is currently developing her original animated feature film, Art of Auld Lang Syne, while also expanding her work in book design and print formatting.
In addition to supporting other authors, Anna writes her own fiction and recently completed a supernatural horror manuscript.
When she’s not behind her drawing tablet, she can usually be found playing video games or taking her two “little monsters,” Shelby and Percy, bowling.
She is open to commissions in animation, game design, and illustration.