The Value of A Press Kit by Melinda Pierce
 Today Melinda Pierce, author and blogger, will share her tips on what you need to put together a great press kit. Enjoy!
***
Having worked as an executive assistant for a publisher, I have a great appreciation for press kits. I would often receive emails from a conference coordinator or my boss needing promotional items sent ASAP. I’d pull items from one folder or another, or grab what was posted on the website, and shoot it all off only to find out there was a word limit on the bio or the JPEG resolution was too high on the headshot. It became frustrating and time consuming. So, I got organized and put together a kit.
Now, you’re probably asking yourself how this applies to you as an author. Or, maybe you’re not sure how to begin putting a kit together yourself.
If you work with a publishing company that assigns a publicist, or if you are agented, chances are they will give you a specific list of items to provide for promotional purposes. From that point forward they will be the main point of contact for all those items, and you can focus on writing. Lucky you!
But what if you don’t have an agent or publicist? If you are coordinating your own blog tours, book signings, conference presentations, author chats, etc., then you need to take the time to put together a media kit. Trust me when I say, it will save time in the long run especially when you are already fighting for precious time between promoting your current book and writing your next.
Ideally speaking, the press kit (or media kit) usually includes bios of various lengths, a professional headshot or logo, workshop/chat presentation blurbs and handouts, book blurbs of various lengths, and book covers in standard JPEG format. All these items should be stored in one document folder.
Let’s break it down item by item:
- A professional headshot. This is a must. Throw out the pic you took with your cell phone where you cropped out your best friend/spouse. Low on funds? Sears and Walmart offer inexpensive photo packages. Ask around in your circle of friends, and usually you can find an independent photographer looking to build their portfolio. If you are an author who prefers not to use a headshot due to anonymity, then it’s time to get creative. Make yourself a logo with either your initials or something that stands out as your brand. Have your pic or logo in high and low resolutions, and drop these inside your press kit folder.
- Bios. Yes, plural. First, you should have a short bio that is no longer than 250 words. Then, expand it into a longer bio of approximately three paragraphs. It doesn’t matter if they are written in the first or third person, but make sure they reflect your personality, and ALWAYS check for typos. Don’t forget to add your Twitter, FB, website, and purchase links to the bottom of each document. Include them in your folder.
- Book Blurbs. Again, have more than one ready. A short, 250-word blurb and a longer two-paragraph blurb should be prepared. If you don’t have links for purchase added to your bios, your book blurb is definitely the place to add them. Are you allowed an excerpt? Place it with the blurbs. Check again for those nasty typos, and pop them in the folder.
- Book Cover Graphic. In most cases the publisher will send you a high resolution JPEG or GIF. Great. All you need to do is resize it to a smaller resolution, and you are ready to go. But what if you receive a GIF or other format, and are asked for a JPEG only? Don’t despair. Google “free image converters” and quickly convert them. Drop your graphic in – yep – that same document folder.
- Chat or Conference Presentation Blurbs. No, chances are you won’t know the topics you are going to present too far in advance. However once you get these nailed down, be sure to add them to your press kit. If you are ever asked to present again on the same topic, or you need to make sure you don’t duplicate topics, you’ll have them all in your folder for reference. If you prepare handouts, keep them here as well.
One more tip: Make sure you clearly label and name each item. I even like to add the month and year updated to the saved name. And there you have it – A professional and organized press kit, ready to send with a few clicks.
Feel free to comment and share your experiences or any additional suggestions for press kits.
Thanks for stopping by, and as always, Happy Writing!
Melinda
***
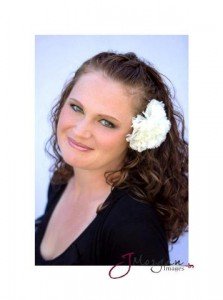 Melinda B. Pierce is an author hobbyist, mother of two, and Membership Director for Savvy Authors. When she has time she writes in almost every sub-genre of romance and refuses to follow the path of most resistance. Connect with her on twitter @MelindaBPierce.



I NEEDED this post! Bookmarking NOW! Awesome 🙂 Thanks!!
Thanks Melinda – this is EXTREMELY helpful! 🙂
I’ve been meaning to put together a Press Kit for myself and now I know how to do it! Thanks so much!
Very helpful! I wouldn’t have thought about the presentation blurbs, but that’s a great suggestion. Thanks!
Interesting. I guess this would be very helpful to young writers.